Author: Nova Li

How to Increment Your NetSuite Schema in Boomi After a Schema Deprecation

First lets explain how NetSuite schema support and deprecation works. I’m not going to quote this, but NetSuite explains it in a way that sounds pretty complicated and I don’t think is completely accurate. You can find this explanation here.

I prefer to explain it in simpler terms. On the 7th year, a schema is hard deprecated and you can no longer use it. Example, when the UI is incremented to 2025.1, 2018.1 will no longer be usable. 

  • The reason that I disagreed with NetSuite’s explanation is that it really seemed to directly state the schema’s introduction into general availability is what triggers the line in the sand to move, but I’m very certain that this isn’t true. When the UI is incremented, that is what triggers the line in the sand to move. The same version of SOAP schema will usually not be generally available until quite awhile after the UI is incremented and therefore has nothing to do with the deprecation dates.
  • Technically NetSuite only supports the latest 6 versions (or 3 years). This is functionally irrelevant for most customers. You could use this as a reason to increment your connector every 3 years instead of every 6, but my experience has shown there is very little reason to do so for most customers.

Second, lets discuss how to increment your NetSuite connection in Boomi whenever your existing schema is deprecated, or better yet, before it is deprecated.  Lets talk about this as if we are updating a single process, because you probably should do this one process at a time anyway. Many people will tell you and in fact it is the standard accepted belief that you should go to each NetSuite operation in that process and refresh it, using an incremented connector. While this may be the right way for the operation, it’s the wrong way for the process, the maps, your time and pretty much everything else. Unless you really know better than I or you just refuse to believe me, don’t do it this way. You will break more things this way and even if you break nothing it will take you way longer.

Follow these steps to do it the safest and fastest way. I’ll explain why at the end.

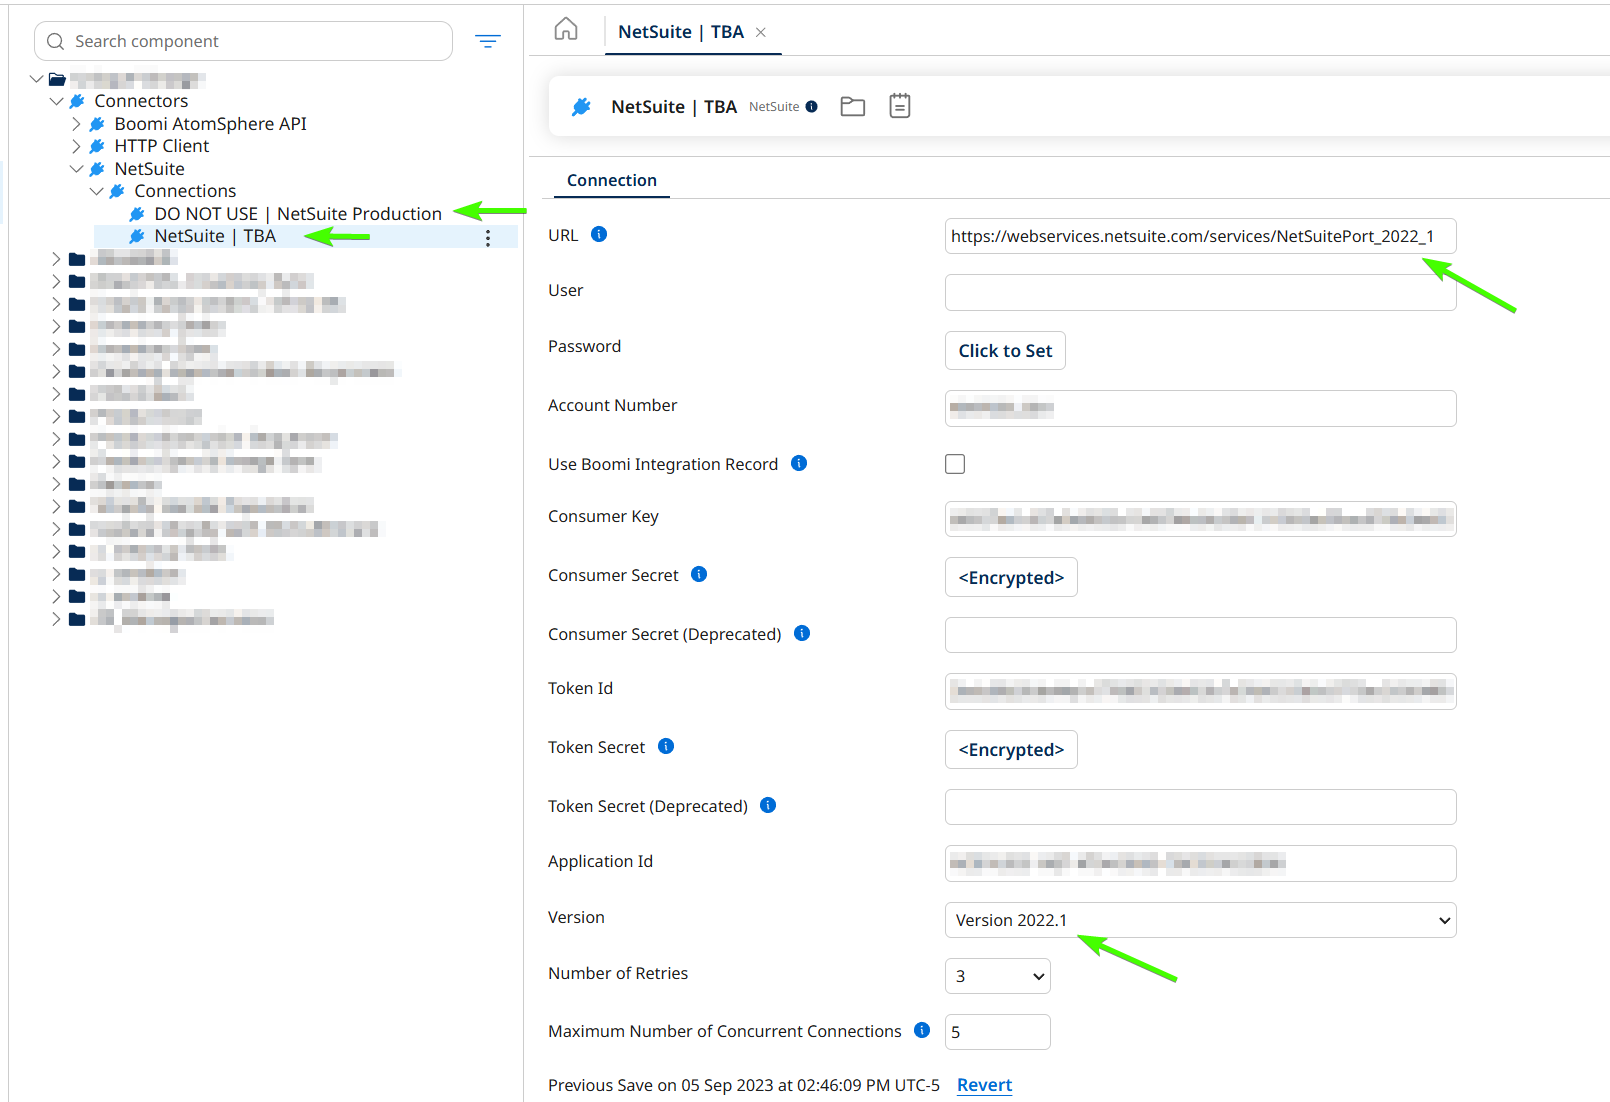
  1. Go to your connections and increment them. You may need to do this in extensions (I don’t extend, or at least I don’t change, this part because it’s impossible to change this and have it work without a deployment anyway). In my case, I will update both my connections. (the Production one exists for imports only)

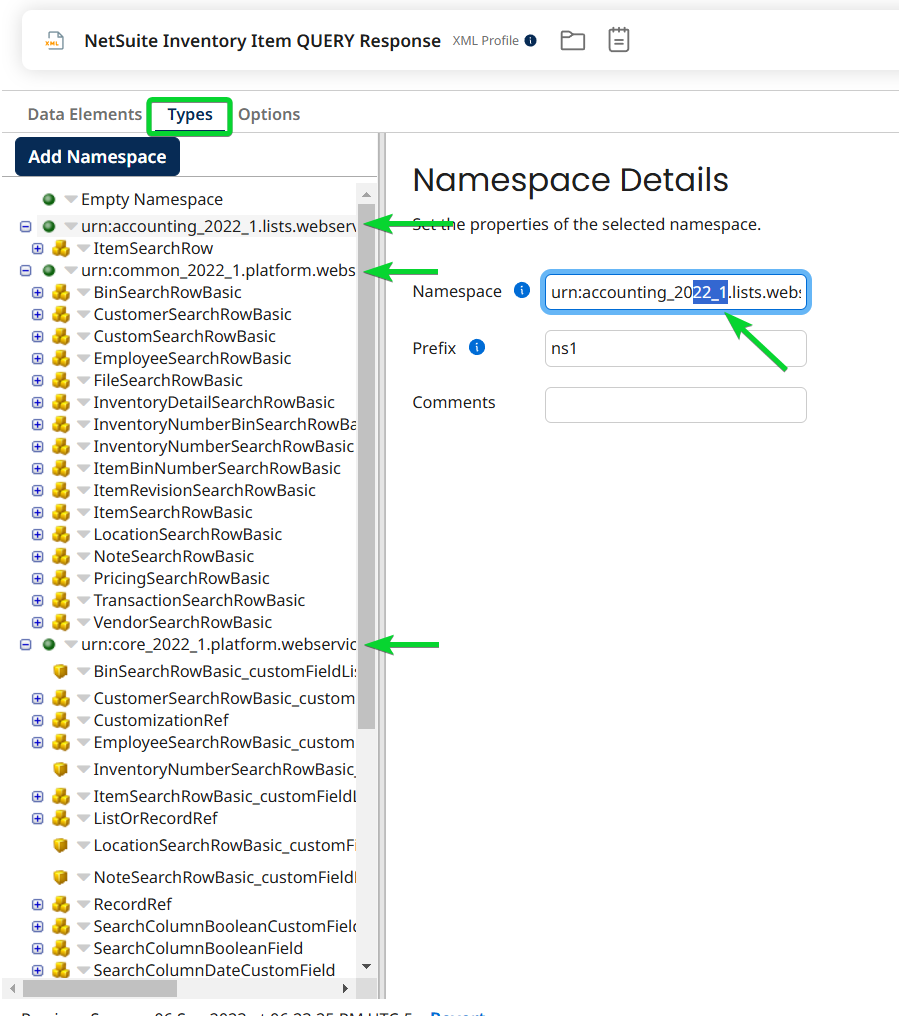
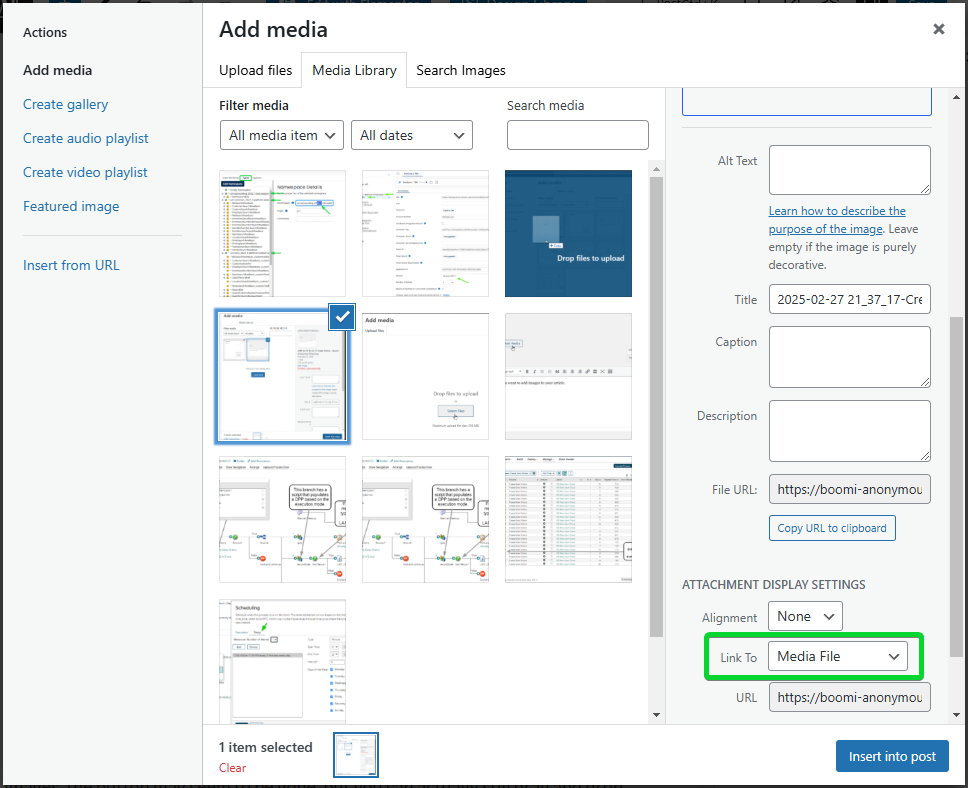
  2. Open one NetSuite xml profile at a time, go to the ‘Types’ tab and locate the 3 or 4 places where the schema number is noted and increment them to match your update connections. Don’t forget to save.
  3. Once you have done this for all profiles in the first process, deploy that process and test it. This will help you make sure that you have this down before you waste time doing it on more than one process.

This is still tedious. There’s no way around that. It’s actually faster than re-importing from the operation though. Try doing one that way if you don’t believe me. It’s also way safer, because you aren’t making a significant change to the profiles. Therefore you are very unlikely to break a mapping. Yes something can still go wrong, but I wouldn’t expect to run into more than one or two problems for a whole account. I have done this on multiple accounts and the number of issues that I’ve run into have been 1 or 2 per account. If something goes wrong, you will get an error. This is what we want. With the alternate method, if something goes wrong, you could lose a mapping. This is not guaranteed to throw an error and therefore is much more dangerous.

How to Create an Article with Images

If you want to add images to your article, just hit the add media button.

Once you are here, click ‘select files’ and go ahead and choose all of the images that you want to use in your article to save time.

Once they are uploaded, any that you have checked will be added directly to your article when you hit ‘Insert into page’. Make sure you choose Link To: Media File so that if the image is too small in your post, people can still view the full size image.

If you failed to follow my advice from earlier and realized that you need to add more images, the button may seem to be gone, but you can actually still drag and drop more images here, like this.

Finally, make sure you have your article looking the way you want it before you click ‘Submit Post’, because there really isn’t a good way to edit your article yet. Though you could try commenting on your article with what you want to change and seeing if the site moderator will help you out.

Reprocess Multiple Days of Failed Executions Easily with a Retry Schedule

Reprocess Multiple Days of Failed Executions Easily with a Retry Schedule

The retry works by re-using the documents that were picked up by the start shape. If your process does not have a connector start shape, or it is not returning the relevant data to be processed in the start shape, then it is unlikely that this will accomplish what you need and you should come up with a different method for reprocessing failed documents.

This article is based on a real production situation. I took advantage of the situation and documented the process for your benefit. 

  1. Before I enabled the retry schedule, I analyzed my process to be sure it would work. My process actually starts with a connector so I’m all good there. But my process uses a persisted Dynamic Process Property to determine the starting point for the next query. However, as an added bonus, this process is made completely retry friendly by only updating this value IF it is not a retry execution. I could still do this without this special handling in the process, especially for a one time fix, but I would need to note the DPP stored value and repopulate it before I start up the regular processing again. Because I have this handling, I will not need to do that. I will still note the DPP starting value though just in case (You should stop the schedules on the process and make sure it isn’t running before capturing this value).

  1. I will stop the standard schedule and start the retry schedule for this one time reprocessing of multiple days worth of failures.
  • I will make a note of the existing standard execution schedule and delete it. To do this you must delete it, since you cannot pause both schedules independently. I don’t think this is necessary, especially with how my process is set up. This is just an added precaution.
  • At the same time, I will add my retry schedule. I set it at 5 minutes, but I don’t think this value matters very much. I think it will actually retry all the un-retried failures in a very programmatic way, starting at your first scheduled trigger. Because of this, I think you may only need a single trigger for this. 
  • I set my Maximum Number of Retries to ‘1’. I’m assuming ‘0’ was the correct choice and would mean that it would try once, but I wasn’t sure so I chose ‘1’ to be safe. My errors were due to a temporary issue with the destination endpoint, so trying more than once is unnecessary.

  1. After I ‘OK’ my schedule changes, the result is always impressive. I would like to draw your attention to a few things.
  • Based on the appearance, I believe it is adding them all to a queue and then processing them sequentially. The starting times will all be very close together and then the processing time will show as very long for the last ones processed and very short for the first ones. In my example, I had 188 executions that were retried and they all showed start times within 1 minute of each other, but they did not all finish until around 1 hr 20 minutes
  • It only reprocesses the failed start shape documents. It will not reprocess the successful ones.
  • It’s very automatic. With just a few steps I’m reprocessing ALL the un-retried failures for as far back as it has data. I believe this is dependent on your Account Property: Purge History After X Days value (This value cannot necessarily be changed to any effect in a public atom cloud).  In my example it was set to 14 days, but most failures were within the last 2 days.

More about my specific example

My example was 188 executions containing 266 failed orders. It seemed like a database issue and it only failed certain documents out of batches, so almost every execution had some successful and some failed documents. I was able to reprocess all of these with about 5 minutes of setup and 1 hour and 20 minutes of processing time. There is literally no other solution I could have used that would only take 5 minutes of my time.

Think about how you want to handle reprocessing failures

My process was actually specifically designed to be able to utilize retries and utilize them very gracefully. This article is intended to do two things. 

  1. Show you how the retry schedule actually works
  2. Give you a reason to consider building processes with this in mind

There are many reasons why some use cases can’t or shouldn’t be built this way. Please do not take this as the only way you should consider designing a process. 

Use this for connectivity issues or hotfixes

In my example it was a connectivity issue that caused the errors, so nothing in the process had to change, but this is completely viable for correcting a defect in the process as well. As long as your fix does not introduce data into the start shape document that wasn’t there before, all you have to do is build and test your fix. Then after you deploy your fix to production you can use these same steps to reprocess all the failures under the newly deployed code.